Saturday, January 30, 2010

Finally, some snow!

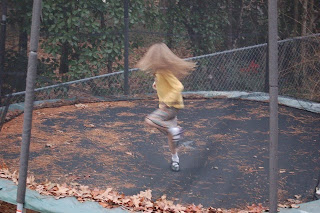
Actually, it was mainly ice with just the tiniest dusting of snow on top. But it was enough to send my daughter into a joyous whirlwind of "It's a wonderland!" and "Look! Our driveway is all white!" and of course "Let's go play - NOW!"

There wasn't enough snow for a snowman, or even a small snowball. But the layer of ice on all the roads made for some AWESOME sledding.


It also made the bottom of the slide reeeallly slick.


Toodles,

Friday, January 29, 2010

DIY leg pillow

I sleep on my side and I use one of those leg pillows to help keep my back from going all out of whack. The one I had was soooo old and sooo pitiful. I bought it several years ago and it's all worn out. The foam inside the cover is literally all broken apart; I just stacked it, taped it together, and put it back into the cover.

So when I was at Hancock's when they had their pillow forms on sale, AND I had a few extra dollars spending money in my pocket, I decided the stars had aligned and the universe was telling me to finally send that old pitiful leg pillow to the trash.

I won't even take a picture of the old one - I would be far too embarassed to have it out on the Internet as something I still used. But look at the new one. Isn't she pretty?


I made it from a Nu-foam Poly-fil densified batting chair cushion and 1/3 of a yard of fabric. The sale price was $5, and I only used half of it. If I was to buy a new one, it would cost me far more than that. And I wouldn't get my choice of fabric for the cover!

I created a tutorial for making one, and have it posted out at Craft Gossip. So if you need a new leg pillow, go check it out.


Toodles,

Thursday, January 28, 2010

Stymied

I have an idea for what I think will be a really easy, really neat no-sew fabric project, but I keep getting stymied.

First I didn't have the right fabric. Which totally blew me away because I have enough fabric to fill a three bedroom apartment. And yet I didn't have fabric that was right for the project in mind. So Liv and I went and bought some more fabric just for this project. Ridiculous, I know.

Then instead of being able to dive right in, I had to clear some teaching stuff out of the way. Another day or two delay.

Finally... yesterday I cleared my afternoon schedule and get all set to make said project. I work up a template in Word, but then my printer wouldn't work. Foiled again!

I feel frustration as I TRY to maintain my "post at least one sewing project a week" resolution, but the universe seems to be working against me this week. Maybe tomorrow the stars will align?

Toodles,

Monday, January 25, 2010

Low-carb chicken enchiladas - YUM!!!

This recipe is for a low-carb chicken enchilada that's actually really really yummy. This recipe is based on a very similar recipe at Diabetic Life, but I tweaked it for my own taste, adding more garlic, using jack cheese instead of mozzarella, and adding sour cream to the chicken mixture.

I made them for dinner when family came over for dinner the other night, and they turned out so good that we made them again last night. (Had plenty of leftover parsley and cilantro that hadn't gone bad yet so it seemed good timing.) My sister has declared that on the next gift-giving occasion she wants a whole batch just for her. Easily done.

Anyway, to make the enchiladas, you'll need:

1/2 cup fresh parsley
1/2 cup fresh cilantro
4-5 large cloves garlic
2 cups green salsa (I used Kroger brand tomatillo salsa verde)
4 tbsp lime juice
2 - 3 cups cooked diced chicken breast
1/3 cup sour cream (or roughly thereabouts. I actually just used 2 big whollops, but I figured 1/3 cup was more of a technical term)
2 cups shredded monterrey jack cheese
Low carb tortillas. (I used Tumaro's Low In Carb Gourmet Tortillas from Kroger)

Preheat your oven to 350 degrees.

In a food processor, mix together the parsley, cilantro, garlic, green salsa, and lime juice to make a green sauce.

Then, in a mixing bowl combine the chicken breast, the sour cream, 1/2 of the green sauce you just made, and approx. 1/2 cup jack cheese.

When it's all mixed, spoon it into 6 8" low-carb tortillas. Roll them up and lay them seam-side down in a casserole dish. Cover with the rest of the green sauce and the rest of the monterrey jack cheese. Bake at 350 degrees until the cheese is melty.

I served it with a side of citrus salad - chunks of fresh grapefruit and orange with bits of fresh cilantro thrown in - and steamed asparagus.

Mmmmm....


Toodles,

Sunday, January 24, 2010

My favorite email ever

Earlier today I got what has to be my most favorite email ever. It's from my mother, but clearly the words were dictated from Olivia who was spending the day at her Nan's (my mother's) house.

Subject: Olivia's Day

First I got up. Then I got dressed. Then I brushed my teeth. Then I went to church. Then I came home and ate lunch. Then me and my mom played marbles. Then we got on Webkins. Then we cuddled.

Then Daddy came home. Then Nan came over and picked me up to go to her house. Then we played Groovy Girls. Then we did laundry. Then we wrote this email.

Love,
Olivia


My most favoritest email. EVER.

Toodles,

Friday, January 22, 2010

More new fabric for me!

Or should I say, more old fabric for me!


From my sweet sweet generous sister. I... just...couldn't.... say... no.

Working today on school stuff, so no sewing for me!
Toodles,

Wednesday, January 20, 2010

We both have new skirts!

Liv and I both have new skirts! Hers is the one I made earlier this week out of the striped quilted cotton.


And the action shots.


Mine is refashioned from an UGLY wool dress my mother gave me. Check the before pics:
U-G-L-Y.

It's a lined dress and it has a zipper that goes all the way up the back. I realized I could keep the zipper if I unzipped it before cutting across it at the waist. That way, the zipper pull would be down at the bottom.

When I cut across the dress at the waist, I ended up with an outer skirt and a lining that were joined at the zipper. I took the edges in on both of them, flaring from the waist out to the full width at the bottom to create an A-line shape.

I finished the waist off with bias tape. I extended the bias tape across the zipper to create a stop for the zipper pull.

And now, the results of the refashion:


It was just me and the little girl this afternoon, so she got to use mommy's big camera. Hence the funny faces - apparently my poses were "boring".

Toodles,

Mix-n-match Valentine's napkin rings

Last weekend I worked up these mix-n-match Valentine's napkin rings. It's essentially a band that buttons around a napkin, with a series of other embellishments buttoned on. Layer as many or as few as you like to get the look you want.

Want to make one? I've got the tutorial for you out on Craft Gossip. It's a quick little project with just some fused fabric and some buttonholes. Oh, and a button too! Check it out!


Toodles,


Tuesday, January 19, 2010

Turning it on its side

Last week I showed you some of the fabrics and patterns from my stepmother. One of the fabrics not shown was this one - it was already in my sewing room getting cut up into a project.

It's a pretty print, no?


The colors and the cute little motifs remind me of some of today's Japanese imports. Traditional, but with flair. And it's quilted. *sigh*


But look what magic happens when you turn the striped fabric on its bias and make a bias-cut skirt.


The A-line shape was easy to draft, starting with a rectangle and then slashing and spreading to get the flared bottom. It took some creativity to get the pattern pieces placed and cut out of my small bit of fabric, but the quilted lines helped by marking the bias grain for me. Then it was just a matter of sewing side seams, using bias binding for the hem and waistline, and installing an invisible zipper.

The challenge for me on this project was getting the invisible zipper in right. I had never installed an invisible zipper before and the instructions from the zipper foot package were less than helpful. And the stupid plastic foot wouldn't fit any of the sewing machines in the house. There was much cursing after my first attempt ended up with the zipper in backwards.

In the end I emerged victorious and made a few "Woo! Woo!" victory laps around the house, skirt in hand, feeling the sewing power. "I don't need no stinkin' plastic crappy foot!"

It fits Liv to a tee and looks far cuter on my little model than it does hanging from a clotheshanger. I'll take pictures of her wearing it tomorrow when we've got good light.


Toodles,

Saturday, January 16, 2010

It's a losing battle...

...and let me show you why.

Last week I made a patchwork hat for Liv. With all of the piecing and the lining and the pompom, I think I used up say.... 24" x 40" area of fabric?

And then the next day I had dinner with the family, and my stepmother hands me a bag of fabric and patterns left over from when she was making her granddaughter (Liv's step-cousin?) some American Girl doll clothes.

She gave me a pile of fleece. (The blue on top is actually craft felt.)


Some vintage prints. There's also a quilted stripe but I had already started a project with that when I took the pic.


And some patterns. There are three more Simplicity patterns that aren't pictured.


And also some small D-rings and about 18" of velcro.

Oh, and my sister gave me an assortment of old buttons she scored at an estate sale.


Let's put this side by side, shall we? The pile on the left is all my new fabric. That small folded up thing on the right is the fabric that left the studio in the form of a completed project.


The good news is that I've found a home for the fleece. The mama of one of Liv's friends was saying that she loved sewing with polar fleece. "Oh, fleece? You want some more?" Hehehe.

Toodles,

Thursday, January 14, 2010

Tutorial: Deli meat & cheese mini-kabobs

Today I included these meat & cheese mini-kabobs in Liv's bento lunchbox. These are super easy to make, so I thought I'd create a little tutorial showing how to it. I used mozarella and roast beef, but you can use any deli-style meat and cheese.


Here's how I did it:

1. I started with two slices of roast beef and two sticks of mozarella approx 1/2 inch thick.


2. I folded the slices of roast beef in half lengthwise. This made them the same height as the cheese sticks. Depending on the size of your meat slices and length of your cheese sticks you may need to fold more or less.


3. Place the cheese sticks on top of the sliced roast beef and roll up.


4. Cut across the rolled up meat & cheese.


5. Now you've got a lot of little meat-wrapped cheese squares.


6. Just stab them on some pretty toothpicks and put them in the lunchbox! Less than 3 minutes start to finish.


This was the first time I've made these for her, so I'll have to wait until school is over to gauge her reaction. I made some for myself for lunch, though, and they've got my seal of approval.

Toodles,